Most homeowners don’t think about the P-trap until something starts going wrong—slow drainage, bad smells, or water backing up in the sink. But from a plumber’s perspective, the P-trap is one of the most important and most active parts of your entire drain system. It’s the first place where debris settles, where buildup starts forming, and where small problems quietly grow into bigger clogs.
The P-trap is that curved pipe under your sink, and it’s designed to do two critical jobs at the same time. First, it holds a small amount of water to block sewer gases from coming back into your home. Second, it catches debris before it travels deeper into your plumbing system. That second job is exactly why it needs regular attention. Over time, everything from grease and food particles in the kitchen to hair and soap in the bathroom collects right there.
This is where many homeowners go wrong—they treat drain issues only when water stops flowing. But real drain maintenance starts before that point. Cleaning the P-trap is not a repair task; it’s a preventive habit. When done regularly, it keeps water flowing smoothly, prevents foul odors, and reduces the chances of deeper, more expensive blockages in your pipes.
In this guide, you’ll learn exactly how plumbers approach P-trap cleaning in real homes. Not just how to clean it once, but how to make it part of a simple maintenance routine that protects your entire drain system over time.
What This Page Covers
ToggleWhat a P-Trap Actually Does in Your Plumbing System
Most people see the P-trap as just a curved pipe under the sink, but from a plumbing standpoint, it’s a critical control point in your entire drainage system. It’s not there by accident—it’s designed to solve two major problems that every home would otherwise face: sewer gas entering the home and debris moving freely into deeper pipes.
The first job of the P-trap is to hold a small amount of water at all times. This water creates a seal that blocks harmful sewer gases from coming back up through the drain. Without that seal, you would constantly smell unpleasant odors coming from your sink, and in some cases, those gases can even be hazardous. This is why a properly functioning P-trap is essential for both comfort and safety inside your home.
The second job is where maintenance becomes important. The P-trap acts like a natural collection point for debris. Instead of letting hair, grease, soap residue, or food particles travel deeper into your plumbing system—where they can cause serious blockages—it traps a large portion of that material right there. This design actually protects your main drain line, but it also means the P-trap becomes the first place buildup starts forming.
Over time, that trapped debris doesn’t just sit there—it compacts, sticks to the pipe walls, and slows water flow. What starts as a minor restriction can quickly turn into a full blockage if ignored. That’s why plumbers often check the P-trap first when diagnosing drain problems—it’s the most common and most accessible trouble spot.
Understanding this role changes how you approach drain care. Instead of seeing the P-trap as just another pipe, you start treating it as a maintenance point—a place where small, regular cleaning can prevent bigger plumbing issues later on.
Signs Your P-Trap Needs Cleaning
In most homes, the P-trap doesn’t suddenly clog overnight. It builds up slowly, and the plumbing system gives you early warning signs long before a full blockage happens. The problem is, many homeowners ignore these small signals until the drain stops working completely. From a plumber’s perspective, catching these signs early is what keeps maintenance simple and avoids bigger repairs.
One of the most common signs is slow drainage. Water still goes down, but it lingers longer than usual. This usually means debris has started coating the inside of the P-trap, narrowing the flow path. Along with that, you might notice standing water in the sink that takes time to clear after use. These are early indicators that buildup is forming exactly where the P-trap curves.
Bad odors are another strong signal. When organic material like food, grease, or hair sits inside the trap, it begins to break down and produce a foul smell. If you notice a persistent odor coming from the drain—even when it’s not clogged—that’s often trapped debris inside the P-trap, not a deeper sewer issue.
You may also hear gurgling sounds when water drains. This happens when airflow is restricted due to partial blockage. It’s a sign that water is struggling to pass through smoothly. In some cases, minor clogs may seem to “fix themselves” temporarily, only to return again and again. That’s because the buildup is still sitting inside the trap, catching more debris each time you use the sink.
Watch for these clear warning signs:
- Slow draining water that doesn’t flow smoothly
- Unpleasant smells coming from the drain
- Gurgling or bubbling noises during drainage
- Recurring minor clogs that keep coming back
- Water backing up briefly before draining
When you notice even one or two of these signs, it’s the right time to clean the P-trap. Waiting too long allows the buildup to harden and spread further into the system, making the problem harder to fix.
What Builds Up Inside a P-Trap Over Time
The P-trap doesn’t just “catch debris”—it becomes a mixing zone where different types of waste combine, stick, and slowly turn into thick buildup. This is why clogs inside a P-trap feel heavier and more stubborn compared to buildup in straight pipes. From a plumber’s point of view, what’s inside that curved section is usually a compacted layer of multiple materials, not just one simple blockage.
In kitchen sinks, grease is the biggest problem. Even if you don’t pour oil directly down the drain, small amounts from cooking, dishwashing, and food residue still enter the pipe. As grease cools, it sticks to the inner walls of the P-trap. Over time, it forms a sticky coating that traps food particles, creating a dense sludge that restricts water flow.
In bathroom sinks, the buildup is different but just as problematic. Hair, soap scum, toothpaste residue, and skin oils combine into a soft but tangled mass. Soap plays a major role here—it doesn’t just wash away; it reacts with minerals in water and forms a chalky layer that sticks to the pipe. Hair then gets caught in that layer, building up faster than most people expect.
Laundry drains and utility sinks introduce another type of buildup. Lint, detergent residue, and fabric fibers settle inside the P-trap. These materials may seem small, but they clump together over time and create a thick obstruction, especially when combined with soap residue.
Here’s what typically accumulates inside a P-trap:
- Grease and cooking oils that harden and trap debris
- Food particles that settle and decompose
- Hair that tangles and blocks flow
- Soap scum that sticks to pipe walls
- Toothpaste and hygiene product residue
- Lint and detergent buildup from laundry drains
The key thing to understand is that this buildup doesn’t stay loose—it compresses and sticks. That’s why simple flushing with water often isn’t enough once it forms. Regular cleaning prevents this material from turning into a solid mass that restricts flow and leads to recurring clogs.
Safety and Preparation Before Cleaning a P-Trap
Cleaning a P-trap is one of the simplest plumbing tasks a homeowner can do, but skipping basic preparation is where most problems happen. Leaks, damaged fittings, or messy spills usually come from rushing into the job without setting things up properly. From a plumber’s perspective, a clean and controlled setup makes the entire process easier and prevents unnecessary complications.
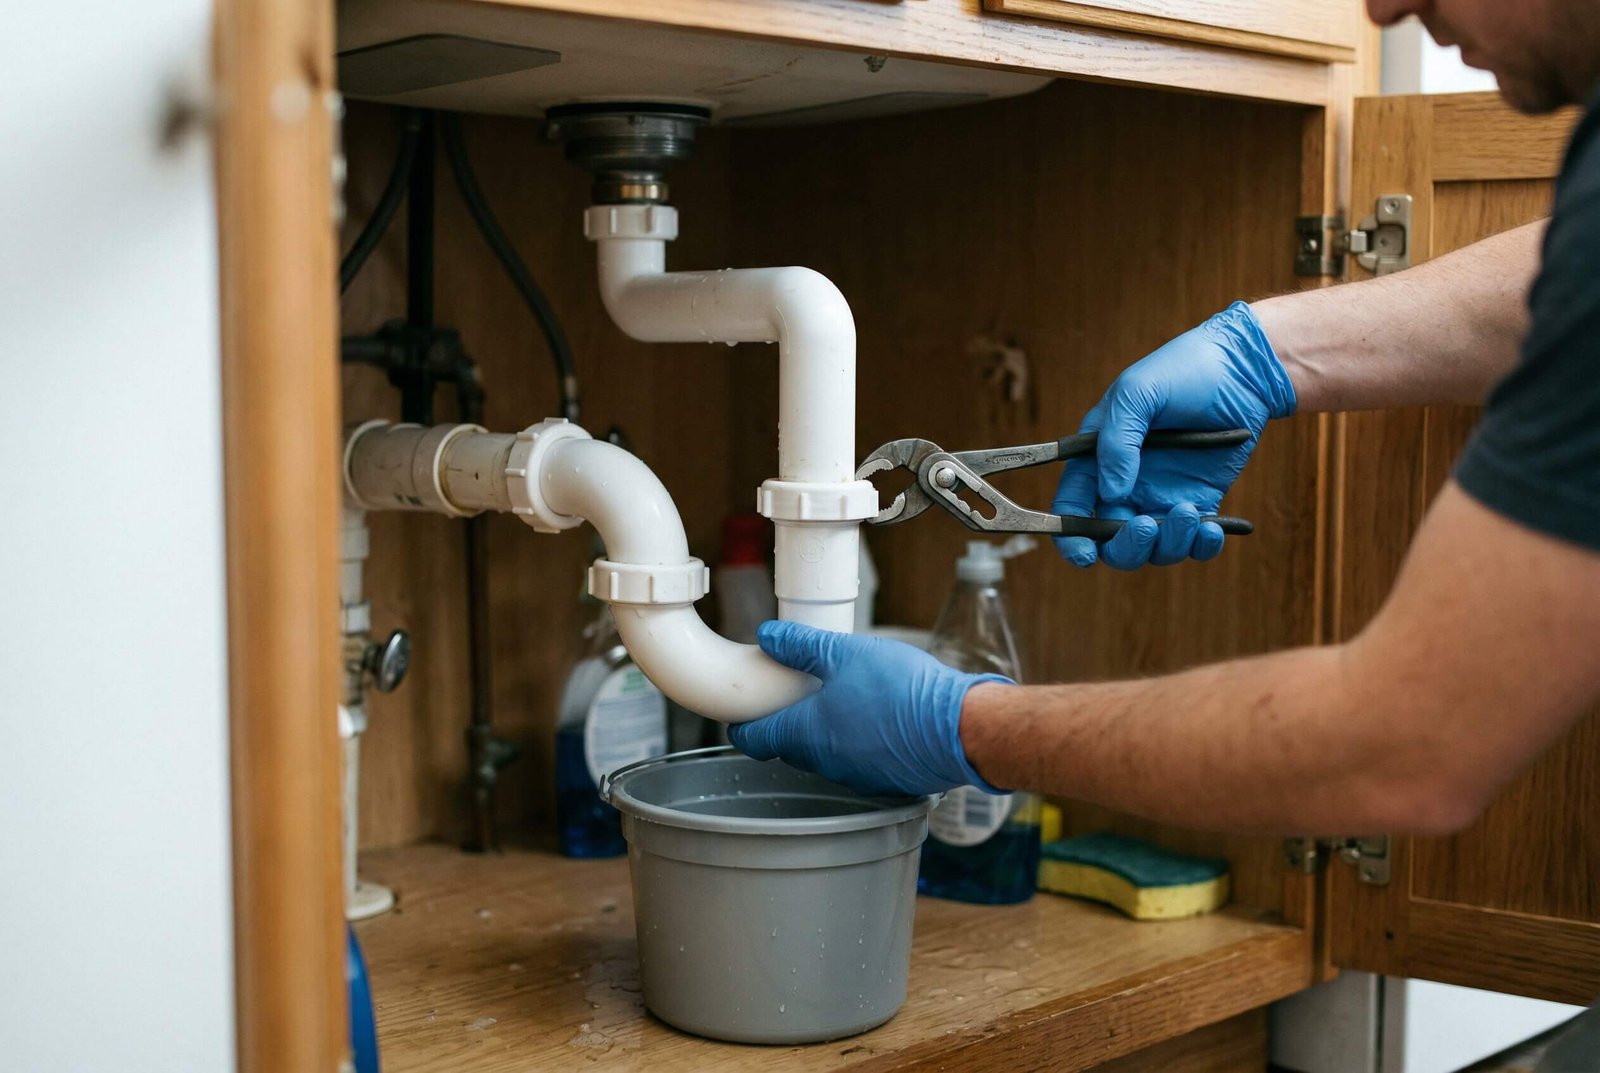
Before you touch the pipe, always clear out the space under the sink. You need enough room to work comfortably and avoid knocking things over once water starts draining out. Place a bucket directly under the P-trap—this is non-negotiable. Even if the drain hasn’t been used recently, there will always be trapped water inside, along with debris that can spill out as soon as you loosen the fittings.
It’s also a good idea to wear gloves. The material inside a P-trap isn’t just dirty—it can contain bacteria, grease, and decomposing waste. Gloves keep the process hygienic and make cleanup easier. Keep a few towels or rags nearby as well, because small drips are almost guaranteed when you disconnect the pipe.
Pay attention to the type of P-trap you have. Most modern homes use PVC (plastic) traps, which are easier to loosen by hand or with light tools. Older homes may have metal traps, which can be tighter and more prone to corrosion. In those cases, you’ll need to be more careful to avoid forcing connections and causing damage.
Before starting, make sure you understand these key preparation steps:
- Clear storage items from under the sink for easy access
- Place a bucket directly beneath the P-trap to catch water
- Wear gloves to handle dirty buildup safely
- Keep towels or rags ready for minor spills
- Identify whether your trap is plastic or metal before loosening
Taking a few minutes to prepare properly turns this into a clean, controlled job instead of a messy repair situation. It also reduces the risk of damaging fittings, which is one of the most common mistakes homeowners make during P-trap cleaning.
Tools You Need to Clean a P-Trap Properly
One of the reasons P-trap cleaning is so practical for homeowners is that it doesn’t require expensive or specialized plumbing equipment. Most of the tools you need are simple, affordable, and often already available at home. What matters more than the tools themselves is using the right ones in the right way to avoid damaging the pipe or creating leaks during reassembly.
At the most basic level, you’re preparing to loosen connections, remove debris, and clean the inside of the pipe. That means you need tools for handling fittings, tools for cleaning buildup, and a few items to keep the process clean and controlled. Skipping the right tools often leads to overtightening, cracked fittings, or incomplete cleaning—which is why even a simple job benefits from proper setup.
Here are the essential tools and why each one matters:
- Bucket to catch water and debris when the trap is removed
- Towels or rags to handle drips and keep the workspace clean
- Adjustable wrench or slip-joint pliers for loosening tighter fittings
- Cleaning brush or old toothbrush to scrub inside the pipe
- Flexible wire or small drain snake to remove compacted buildup
- Mild cleaning solution (dish soap with warm water) to break grease and residue
For most modern PVC P-traps, you may not even need a wrench—hand loosening is often enough. But having pliers nearby helps if fittings are slightly tight. The key is to apply controlled pressure, not force. Over-tightening or over-loosening is one of the most common causes of leaks after reinstallation.
With these basic tools ready, you’re set up to clean the P-trap properly without cutting corners. It keeps the process efficient, prevents damage, and ensures you remove buildup instead of just shifting it around.
Step-by-Step Process to Remove and Clean a P-Trap
Cleaning a P-trap the right way isn’t complicated, but it does need to be done carefully and in the correct order. This is where many homeowners either rush or skip steps, which leads to leaks or incomplete cleaning. From a plumber’s perspective, the goal is simple: remove the trap safely, clean it thoroughly, and reinstall it without disturbing the seal.
Follow this step-by-step process to do it properly:
- Position the bucket and prepare the area
Place your bucket directly under the P-trap. Even if the sink hasn’t been used recently, the trap will contain water and debris. Keep your towels nearby to manage any spills. - Loosen the slip nuts carefully
Most P-traps are connected using slip nuts at both ends. Start loosening them by hand. If they’re tight, use pliers with light pressure. Avoid forcing them, especially on plastic fittings, as they can crack. - Remove the curved trap section
Once the nuts are loose, gently slide the P-trap out. Hold it level as you remove it to prevent spilling debris. Then tilt it over the bucket to empty the contents. - Inspect the inside of the trap
Look inside the pipe. You’ll usually see grease, sludge, hair, or compacted debris stuck to the walls. This inspection helps you understand how severe the buildup is. - Clean the trap thoroughly
Use a brush or old toothbrush to scrub the inside of the pipe. For thicker buildup, use a flexible wire or small snake to loosen compacted material. Rinse with warm water and dish soap to remove grease and residue. - Check washers and connections
Before reinstalling, inspect the washers (rubber seals). Make sure they are clean, properly seated, and not damaged. Misaligned or worn washers are a common cause of leaks. - Reinstall the P-trap and tighten connections
Reattach the trap and hand-tighten the slip nuts first. If needed, use pliers for a slight additional turn—but do not overtighten. - Test for leaks and proper flow
Run water through the sink for a minute or two. Check all connections for leaks and make sure the water drains smoothly.
When done correctly, this entire process takes less than 20–30 minutes and can significantly improve drain flow. More importantly, it removes buildup at the most common clog point before it turns into a bigger plumbing issue.
How to Clean a P-Trap Without Removing It (Light Maintenance Method)
In many cases, you don’t always need to remove the P-trap to keep it clean. For early-stage buildup or routine maintenance, a light cleaning method can help reduce grease, soap residue, and minor debris before it turns into a solid blockage. From a plumber’s perspective, this approach works well as preventive care—but it’s not a replacement for deep cleaning when buildup becomes heavy.
This method focuses on breaking down soft buildup and flushing it through before it sticks and hardens inside the trap. It’s quick, simple, and something you can include in your regular drain maintenance routine.
Here’s how to do it properly:
- Start with hot (not boiling) water
Run hot water through the drain for 1–2 minutes. This helps soften grease and loosen light residue sitting inside the P-trap. - Add dish soap to break down grease
Pour a small amount of liquid dish soap into the drain. Let it sit for a minute, then run more hot water. Dish soap helps cut through oily buildup, especially in kitchen drains. - Use gentle agitation if needed
If you suspect minor buildup, you can use a flexible plastic drain tool or a soft brush to lightly agitate the drain opening. This helps dislodge material before it settles deeper. - Flush thoroughly
Finish with another round of hot water to push loosened debris through the system. Make sure water flows freely without slowing down.
This light maintenance method works best when:
- The drain is slightly slow but not clogged
- There are no strong odors or recurring blockages
- You’re maintaining the system regularly (weekly or biweekly)
It does not work when buildup is thick, compacted, or causing repeated clogs. In those cases, the debris inside the P-trap has already hardened, and flushing alone won’t remove it—you’ll need to remove and clean the trap manually.
Used consistently, this method helps delay heavy buildup and keeps your drain flowing smoothly between deeper cleanings.
Common Mistakes to Avoid When Cleaning a P-Trap
Cleaning a P-trap is simple, but small mistakes can quickly turn it into a bigger plumbing issue. From a plumber’s perspective, most problems don’t come from the cleaning itself—they come from how the pipe is handled before and after. Avoiding these common mistakes will help you keep the system working properly without creating leaks or damaging components.
One of the biggest mistakes is overtightening the connections during reassembly. Many homeowners think tighter means better, but that’s not how these fittings work. P-trap connections are designed to seal with washers, not excessive force. Over-tightening can warp the washer, crack plastic fittings, or make future maintenance harder.
Another common issue is misaligned or improperly placed washers. These small rubber seals are what prevent leaks. If they are twisted, dirty, or not seated correctly, water will start dripping as soon as you run the sink. This is one of the most frequent reasons people think they’ve “done something wrong” after cleaning.
Using harsh chemical drain cleaners is another mistake. These chemicals can damage the inside of the P-trap, especially if it’s made of plastic. They also don’t remove solid buildup effectively once it has formed. In many cases, they just create more residue or weaken the pipe over time.
Here are key mistakes you should always avoid:
- Over-tightening slip nuts and damaging fittings
- Misplacing or ignoring rubber washers during reassembly
- Using chemical cleaners instead of proper manual cleaning
- Forcing stuck connections and cracking the pipe
- Skipping leak testing after reinstalling the trap
- Ignoring recurring clogs that indicate deeper issues
Finally, one mistake that often gets overlooked is assuming the job is done when water flows again. If buildup keeps returning, it may mean the issue extends beyond the P-trap. In those cases, repeated cleaning without deeper inspection only delays a larger problem.
Avoiding these mistakes ensures that P-trap cleaning stays a simple maintenance task—not a repair job.
How Often You Should Clean a P-Trap
There’s no one-size-fits-all schedule for cleaning a P-trap, because every home uses its drains differently. From a plumber’s perspective, the right frequency depends on what goes down your drain, how often it’s used, and how early you respond to warning signs. The goal isn’t to clean it constantly—it’s to clean it before buildup turns into a restriction.
For most households, a light maintenance routine combined with occasional deep cleaning works best. Light maintenance helps slow down buildup, while periodic removal and cleaning of the P-trap clears out anything that has started to accumulate inside.
Here’s a practical schedule most homeowners can follow:
- Weekly (light maintenance)
Run hot water and dish soap through the drain to break down grease and soft residue. This is especially important for kitchen sinks. - Monthly (inspection and light cleaning)
Pay attention to drainage speed, odors, and sounds. If anything feels slightly off, it’s a good time to do a quick flush or light cleaning. - Every 3–6 months (deep cleaning)
Remove the P-trap and clean it thoroughly. This prevents buildup from hardening and keeps the pipe clear. - As needed (based on warning signs)
If you notice slow draining, odors, or recurring clogs, clean the P-trap immediately instead of waiting for your scheduled routine.
Different fixtures may need different attention. Kitchen P-traps usually require more frequent cleaning due to grease and food waste, while bathroom sinks build up more slowly but still need regular maintenance because of hair and soap residue.
The key is consistency. Cleaning the P-trap occasionally isn’t enough—making it part of a simple routine is what keeps your drains flowing smoothly and prevents larger plumbing problems down the line.
When Cleaning the P-Trap Is Not Enough
Cleaning the P-trap solves a lot of common drain issues, but it doesn’t fix everything. One of the biggest mistakes homeowners make is assuming that if the trap is clean, the entire drain system should work perfectly. From a plumber’s perspective, the P-trap is just the first checkpoint—if problems continue after cleaning it, the issue is usually deeper in the system.
If water is still draining slowly even after a thorough P-trap cleaning, that’s a strong sign the blockage is further down the drain line. This could be inside the horizontal pipe behind the wall or even deeper in the main drain line. At that point, the problem isn’t buildup you can easily reach—it’s something that requires different tools and a different approach.
Recurring clogs are another clear indicator. If the sink works fine right after cleaning but starts clogging again within days or weeks, it means debris is continuously coming from further down the pipe or not fully clearing out. This is common when grease buildup extends beyond the trap or when hair and soap have formed a blockage deeper in the system.
Pay attention to these warning signs that cleaning the P-trap alone isn’t enough:
- Drain still runs slow after cleaning the trap
- Clogs keep returning frequently
- Water backs up into other fixtures (like another sink or tub)
- Strong odors remain even after cleaning
- Gurgling sounds continue during drainage
In these situations, the next step usually involves tools like a drain snake to reach deeper into the pipe. If that doesn’t resolve the issue, professional methods such as drain inspection or hydro jetting may be needed to fully clear the line.
Understanding this limit is important. Cleaning the P-trap is a maintenance step—not a solution for every clog. Knowing when to go further (or call a professional) helps prevent small issues from turning into major plumbing problems.
Role of P-Trap Cleaning in a Full Drain Maintenance Routine
P-trap cleaning is not a standalone task—it’s one part of a complete drain maintenance system. From a plumber’s perspective, the biggest difference between homes with constant drain problems and homes with smooth, reliable drainage is not the pipes—it’s the routine. When P-trap cleaning is combined with simple habits and periodic checks, it prevents buildup from ever reaching a point where it causes real trouble.
Think of the P-trap as your first line of defense. It’s where most debris slows down and starts collecting. By cleaning it regularly, you’re stopping buildup before it moves deeper into your plumbing system. But if you only focus on the trap and ignore everything else—what goes down the drain, how often you flush it, and how the system is used—you’re only solving part of the problem.
A proper drain maintenance routine works in layers:
- Daily habits
Avoid sending grease, food scraps, hair, and heavy residue down the drain. Use strainers to catch solid debris before it enters the system. - Weekly maintenance
Flush drains with hot water and dish soap to break down soft buildup and keep pipes flowing smoothly. - Monthly awareness
Watch for early signs like slow drainage, odors, or gurgling sounds. Address small issues before they grow. - Quarterly deep cleaning
Remove and clean the P-trap to clear out compacted debris before it hardens. - Occasional system checks
If needed, use light tools like a drain snake or schedule a professional inspection to ensure deeper pipes remain clear.
When these steps work together, the P-trap stays clean longer, and the entire system benefits. You’re not just reacting to clogs—you’re actively preventing them.
The real value of P-trap cleaning comes from consistency. When it’s part of a structured routine instead of a one-time fix, it reduces emergency plumbing issues, extends the life of your pipes, and keeps your drains working the way they should every day.
Cost of Cleaning or Replacing a P-Trap in the U.S.
Understanding the cost of P-trap maintenance helps you decide when to handle it yourself and when it’s worth calling a professional. From a plumber’s perspective, this is one of the lowest-cost plumbing tasks—especially if you stay ahead of buildup.
For DIY cleaning, the cost is almost nothing. You’re usually using basic tools like a bucket, brush, and dish soap. Even if you need to buy tools, you’re typically spending under $20–$30 one time, and those tools last for years. That’s why regular P-trap cleaning is one of the highest ROI maintenance habits in plumbing.
When you hire a plumber for basic P-trap cleaning or unclogging, costs usually fall into standard drain cleaning pricing.
- Typical drain cleaning cost: $147–$346 on average
- Simple sink or P-trap work: $100–$250 range
- Snaking through the P-trap: $230–$400 depending on service
For repair or replacement, the cost depends on accessibility and materials:
- Minor P-trap repair: around $100–$325
- Simple drain pipe replacement under sink: $100–$350
- Full installation or complex access: $300–$400+
What affects the cost most:
- How easy it is to access the P-trap
- Type of material (PVC is cheaper, metal is higher)
- Severity of buildup or blockage
- Whether additional pipe work is needed
The key takeaway is simple: cleaning your P-trap yourself costs almost nothing, while ignoring it can turn into a $200–$400 service call—or more if the problem spreads deeper into the system.
How to Maintain P-Traps in Different Fixtures
Not all P-traps behave the same, because what goes down each drain is completely different. From a plumber’s perspective, the way you maintain a kitchen P-trap should not be the same as how you handle a bathroom or laundry drain. Understanding these differences is what keeps maintenance effective instead of repetitive.
In the kitchen sink, grease and food particles are the main problem. Even small amounts of oil from cooking or dishwashing stick to the inside of the P-trap and trap other debris. This is why kitchen traps clog faster than most. Regular hot water flushing combined with dish soap is essential here, and deep cleaning should be done more frequently compared to other fixtures.
In the bathroom sink, the issue is usually a combination of hair, soap scum, and toothpaste residue. This buildup tends to be softer at first but quickly turns into a sticky mass that slows drainage. Using a simple drain strainer can significantly reduce how much hair enters the trap, and periodic cleaning prevents that mixture from compacting.
For shower and bathtub drains, the P-trap collects long hair and soap residue. These clogs tend to form faster because hair easily tangles and holds onto other debris. While most buildup starts near the drain opening, a portion of it settles into the P-trap over time. Regular removal of visible hair and occasional trap cleaning helps prevent deeper blockage.
In laundry or utility drains, lint and detergent residue are the biggest concerns. These materials may seem small, but they accumulate over time and form thick deposits inside the trap. Unlike kitchen grease, this buildup is more fibrous and can restrict flow without obvious warning signs.
To maintain P-traps effectively across different fixtures:
- Kitchen sinks need more frequent cleaning due to grease buildup
- Bathroom sinks require hair and soap control with strainers
- Showers and tubs benefit from regular hair removal before it reaches the trap
- Laundry drains need attention to lint and detergent residue
Treating all drains the same is where most maintenance routines fail. Adjusting your approach based on how each fixture is used keeps your P-traps cleaner for longer and reduces the chance of recurring clogs.
Long-Term Strategy to Keep Your P-Trap Clean
Keeping a P-trap clean long-term isn’t about repeated deep cleaning—it’s about controlling what enters the drain and stopping buildup before it starts. From a plumber’s perspective, the homes with the fewest drain issues aren’t the ones that clean more often—they’re the ones that prevent accumulation in the first place. Once you shift from reacting to clogs to managing daily habits, P-trap maintenance becomes easier and far less frequent.
The biggest factor is what goes down your drain every day. Small habits, repeated over time, are what create heavy buildup inside the trap. Grease, food particles, hair, and soap residue don’t cause problems immediately—but they layer inside the pipe and slowly restrict flow. Reducing that input is the most effective long-term strategy.
Here’s what actually works in real homes:
- Avoid pouring grease or oil down the drain, even in small amounts
- Use drain strainers to catch food scraps and hair before they enter the pipe
- Wipe greasy pans with paper towels before washing
- Flush drains regularly with hot water to prevent residue from settling
- Use mild cleaning (like dish soap and warm water) to break down buildup early
Another key part of long-term maintenance is consistency. Instead of waiting for visible problems, follow a simple routine—light weekly maintenance and occasional deep cleaning. This keeps buildup from compacting and eliminates the need for emergency fixes.
It’s also important to recognize when habits need adjusting. If you notice recurring clogs or faster buildup, it usually means something in your daily usage is contributing to the problem. Addressing that early prevents long-term damage and saves money.
A clean P-trap isn’t the result of one good cleaning—it’s the result of controlled usage and simple, repeatable habits. When you follow this approach, your drains stay clear, your maintenance becomes easier, and your plumbing system lasts longer without major issues.
Final Thoughts
Cleaning a P-trap is one of the simplest plumbing tasks you can do, but it has a bigger impact than most homeowners realize. From a plumber’s perspective, this small section of pipe is where most drain problems begin—and also where they can be stopped early. When you keep the P-trap clean, you’re not just improving water flow, you’re protecting the entire drainage system from buildup that can spread deeper into the pipes.
The key takeaway is that this isn’t a one-time fix. P-trap cleaning works best when it becomes part of a routine. A quick check every month, combined with occasional deep cleaning, keeps debris from compacting and turning into stubborn clogs. It also helps you spot early warning signs before they become expensive repairs.
It’s equally important to understand the limits. If problems continue after cleaning, the issue is likely beyond the P-trap. Knowing when to go further—or call a professional—is what separates good maintenance from repeated frustration.
In real homes, the difference between constant drain issues and smooth, reliable flow comes down to consistency. Simple habits, regular attention, and proper cleaning techniques go a long way. When you treat the P-trap as a maintenance point instead of an afterthought, you reduce clogs, eliminate odors, and extend the life of your plumbing system.
A clean P-trap isn’t just about fixing today’s problem—it’s about preventing tomorrow’s.